Composting Bin: What to Add When Your Pile Won’t Heat
A composting bin showing 55°F (13°C) at its centre is not necessarily dead. It may simply be too small, too dry, too carbon-heavy, or too compacted to generate and retain heat. The practical fix is usually a measured addition of nitrogen-rich material, enough moisture, and a thorough remix—not a handful of commercial activator.
A useful working target for a hot pile is roughly 104–131°F (40–55°C) through the active centre. A small household bin may never reach that range, especially in cold weather. Treat temperature as a diagnostic clue, not a pass-or-fail test.
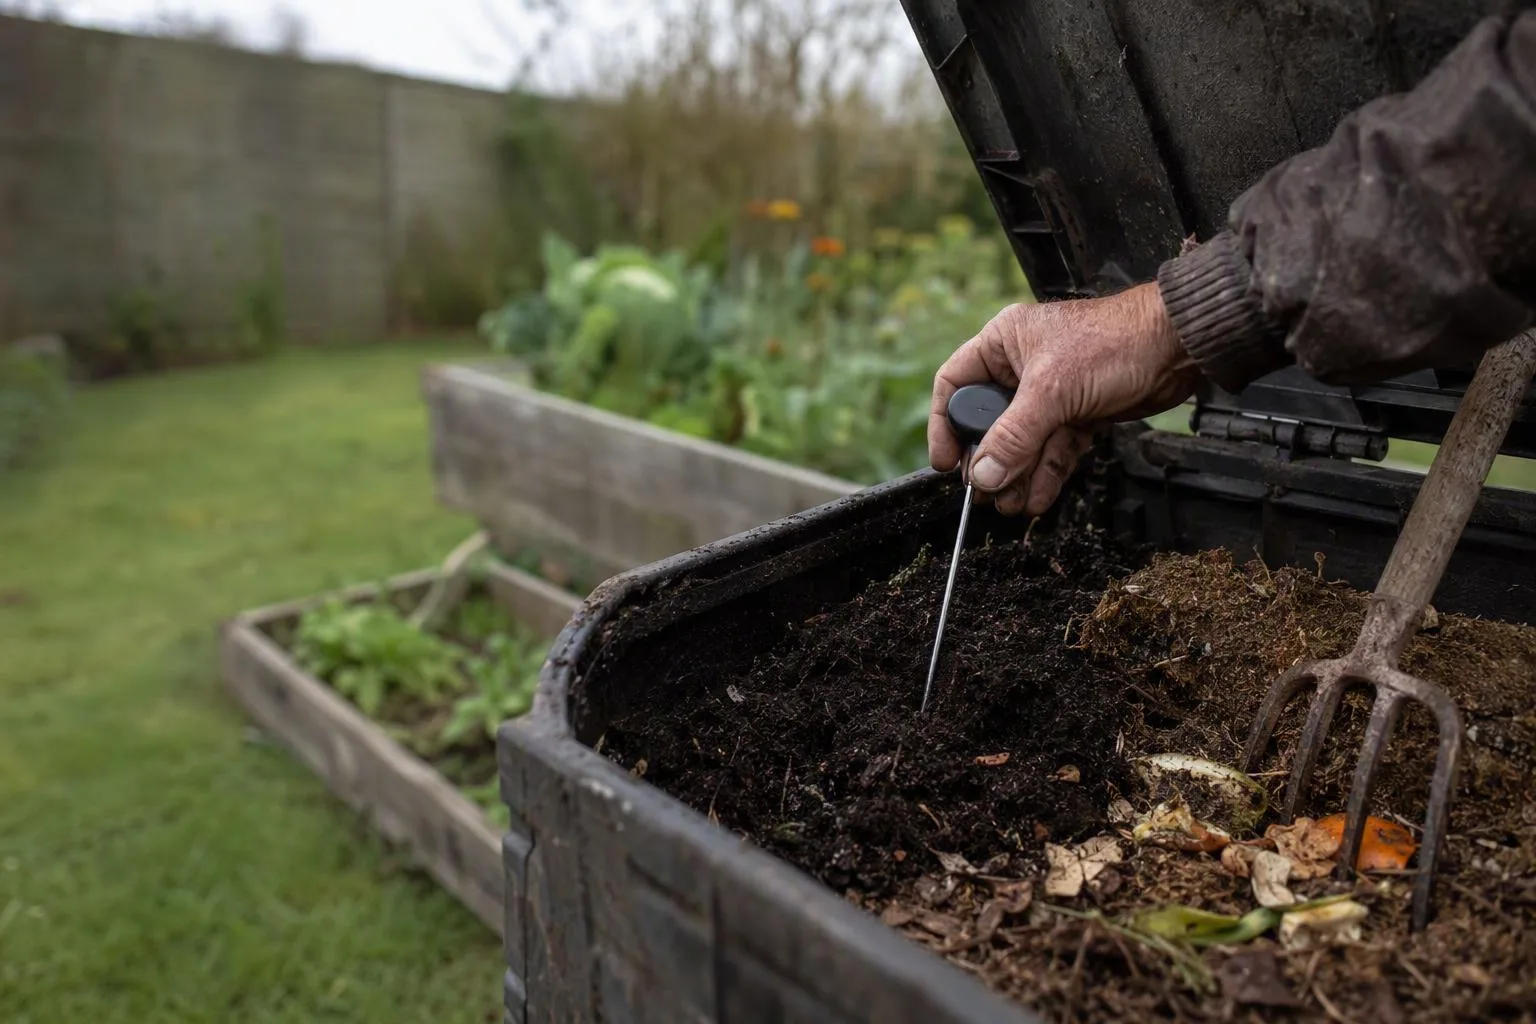
Start by checking four things before you add anything
Before adding grass, manure, coffee grounds, or kitchen scraps, take a sample from the middle of the pile. The surface can be cold because it is exposed to wind and night air while the centre is active. If the probe reads warm in the middle, the pile is working; it may only need turning when the outer material has lagged behind.
For a genuinely cool centre, use this decision path:
- Dry and light: add water gradually while turning. Dry leaves and cardboard often repel water at first, so wet the material in thin layers rather than pouring a bucket over the top.
- Soggy, sour, or slimy: mix in dry shredded cardboard, autumn leaves, or straw. Open the clumps so air can reach them.
- Dense and matted: pull apart grass layers and compacted food waste, then combine them with coarse brown material. A forkful of air is not enough if the pile has become a wet slab.
- Loose but mostly brown: add a nitrogen-rich material such as fresh plant trimmings, green weeds before seeding, or suitable herbivore manure.
- Small with only occasional additions: stop chasing heat. Build volume in a separate batch, or use a slower cold-composting method.
Moisture should feel similar to a wrung-out sponge: damp throughout, but not dripping when squeezed. The exact feel changes with the material. A heap of fresh grass already contains considerable water; a bin of dry leaves may need repeated wetting as it is mixed. Use the compost moisture test: how wet should a compost bin be before deciding that more ingredients are needed.
Size matters because heat is generated inside the mass and lost at its surface. As a practical design threshold, I would treat roughly 3 × 3 × 3 feet, or about one cubic yard, as the useful minimum for a deliberately hot batch. That is a working target, not a guarantee. A smaller bin can compost well, but it has less thermal reserve and reacts more sharply to cold weather.
Do not add a nitrogen source blindly. If the pile smells strongly of ammonia, there may already be plenty of nitrogen, but not enough carbon or structure to hold air. If water runs from the base, improve drainage and add dry material before adding more food.
Rebuild the mix: the additions that supply heat without making a stinking mess
Heat comes from microbial respiration. Microorganisms consume readily available carbon compounds and nitrogen-containing material, using oxygen in the process. Their activity produces heat, but only while the pile has usable food, water, and air. That is why an old mound of dry leaves can sit unchanged for months, while a mixed heap of leaves and fresh trimmings warms within days.
The simplest rescue is to pair wet, nitrogen-rich “greens” with dry, structural “browns.” Greens include fresh grass clippings, green weeds before seed formation, fresh plant trimmings, kitchen scraps, and manure from suitable herbivores. Browns include shredded cardboard, autumn leaves, straw, and small amounts of woody material.
| If the pile looks like this | Add and do this | Why it helps |
|---|---|---|
| Dry leaves and stalks dominate | Mix in fresh greens or finished manure, then moisten | Supplies more readily available nitrogen and water |
| Wet food scraps form dense pockets | Add shredded cardboard or leaves and break the pockets apart | Restores pore space and absorbs excess moisture |
| Fresh grass forms a solid mat | Separate it into thin handfuls and distribute it through browns | Prevents a low-oxygen layer from forming |
| Long stems and woody pieces remain intact | Chop them before mixing | Exposes more surface area to decomposers |
A roughly balanced carbon-to-nitrogen mix is a useful starting point, but you do not need to calculate laboratory ratios for every forkful. A practical rule is to mix each bucket of wet greens with a generous volume of loose browns, then inspect the texture. If the finished mix clumps into a shiny mass, add more dry structure. If it falls apart like dusty straw, add wetter greens and water.
Thick grass layers are a classic quiet failure. Grass clippings are nitrogen-rich and damp, but a deep undisturbed layer can exclude air as it collapses. The same issue occurs with a large quantity of wet kitchen scraps. Distributed through shredded cardboard or leaves, those materials can feed the pile; left in a single layer, they can produce anaerobic odours and slime.
My judgement call is to favour structure over a perfect ratio. A slightly carbon-heavy pile usually matures slowly. A wet, nitrogen-heavy pile can become compacted before you notice, and correcting that requires more work than adding a few extra leaves at the start.
Do not use manure from animals that have recently received unknown treatments, and do not assume every manure source is suitable for a vegetable bed. For edible crops, follow local food-safety guidance on compost maturity and fresh-manure waiting periods. Fresh manure should not be treated as finished compost simply because it has been mixed into a bin.
The article How to balance green and brown materials in a backyard compost pile is the better reference if your main problem is choosing ingredients rather than rescuing a stalled batch.
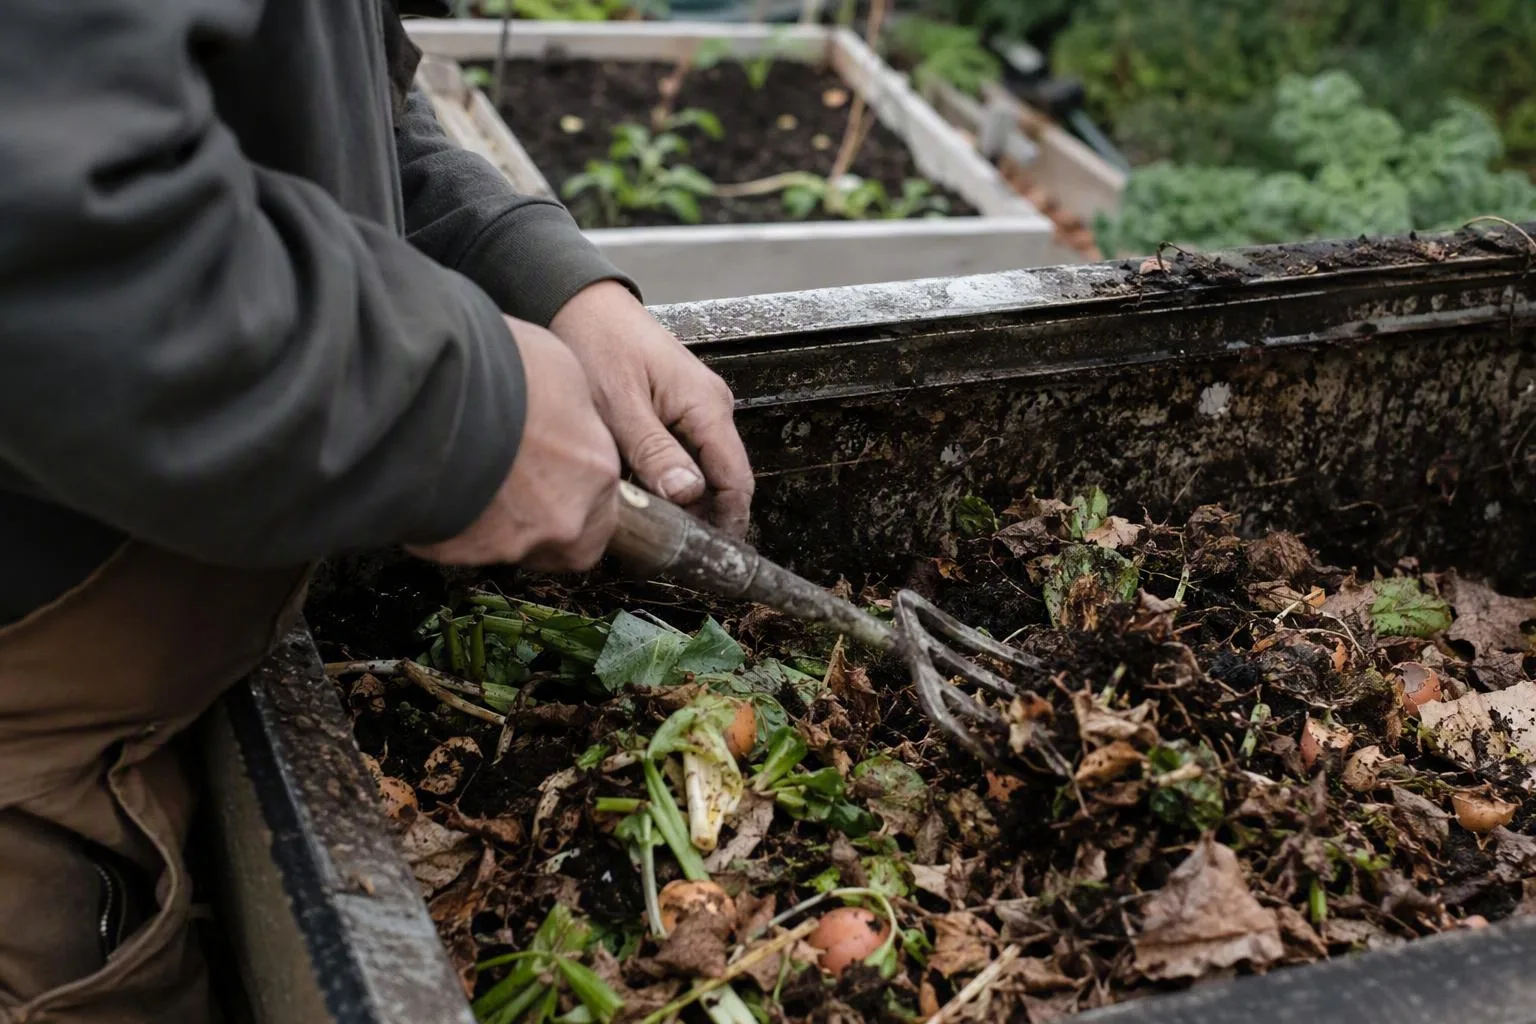
The rescue sequence: chop, moisten, mix, and turn in the right order
Do not keep sprinkling new scraps onto a cold, compacted core. Open the bin and rebuild the active section so the correction reaches the material that needs it.
- Open the pile. Pull back the surface and examine the centre. Note whether it is dry, dripping, sour-smelling, or simply made of recognizable dry leaves.
- Separate mats. Use a fork to tease apart grass, wet paper, and food scraps. Break clumps roughly to fist size or smaller. You are not trying to shred every leaf; you are trying to remove sealed layers.
- Chop oversized material. Cut long stems and tough vines into short pieces. Smaller pieces expose more surface area, but excessive shredding can also make a wet mixture dense, so retain some coarse texture.
- Re-wet dry pockets. Add water as you mix. Stop when the material is evenly damp and holds together briefly without releasing a stream of water.
- Distribute greens and browns. Put fresh material through the whole batch rather than burying one concentrated layer in the centre.
- Rebuild loosely. Fill the bin without stamping it down. Air spaces will shrink naturally as decomposition proceeds.
- Turn once, then wait. A full turn redistributes oxygen, moisture, and the cooler outer material. Repeated turning before the pile has time to respond can throw away heat and dry the batch.
Here is a worked example of the kind of log worth keeping. The readings are an illustrative projection, not a promised result. Imagine a partly filled bin with a dry, brown-heavy centre reading 55°F on Day 1. After adding damp fresh trimmings, shredded cardboard, and a little suitable herbivore manure, the centre reads 61°F on Day 2, 66°F on Day 3, and 68°F on Day 4. On Day 5, the outer material is mixed into the centre; the reading falls briefly to 64°F because cooler material has been incorporated. By Day 7, a reading around 70°F would indicate movement but not a thermophilic hot phase.
If the reading remains near 55°F through Day 4, first check that the probe is in the centre and that the batch is large enough to retain heat. If the pile smells of ammonia after the addition, the next correction should be dry carbon, not more greens. If slimy pockets remain, the problem is physical structure and oxygen. The projection is falsified if the material remains evenly damp, loose, adequately sized, and unchanged in temperature after several days; at that point, the season or bin design is a stronger suspect.
Turning also has a timing cost. It adds air immediately, but it mixes cooler edge material into the warm centre. Turn when the pile has compacted, developed cold zones, or needs fresh oxygen; do not turn on a fixed daily schedule simply because the bin has a lid and a fork.
A small bin may fail to heat in winter even with a sound recipe. Cold air draws heat away, and small additions do not create enough warm mass to overcome that loss. In that situation, insulate the bin where safe, collect ingredients until you can build a larger batch, or accept a slower process. A cold winter bin is not automatically a failed composting bin.
If it still stays cold, change the system rather than chasing additives
After one careful rebuild, the next question is not “what product should I buy?” It is “which system am I actually running?” A small composting bin fed with one kitchen caddy per week is not the same process as a large batch pile assembled in one weekend. It may compost successfully, but it will not behave like a thermophilic heap.
Choose the system that matches the material stream:
- Small static bin: suitable for gradual, slower composting if you can maintain moisture and add dry structure with each batch.
- Large batch pile: the better choice when you want sustained heat, because enough material can be assembled at once to retain warmth.
- Tumbling bin: useful for mixing and aeration, but its limited volume can make temperature swings pronounced. Turning is easy; retaining heat may be harder.
- Leaf-mould setup: a sensible destination for mostly autumn leaves. It relies on slow fungal breakdown rather than a hot, balanced food-scrap process.
- Vermicomposting bin: designed for cool, moist decomposition with worms, not for the hot centre of an actively heating pile.
Commercial compost activator is rarely my first choice. Mature compost or ordinary soil can introduce organisms, but organisms are already present on most garden materials. If the pile lacks nitrogen, water, oxygen, or volume, adding more microbes does not remove the limiting condition. Fix the habitat first.
Coffee grounds are nitrogen-containing, damp, and fine-textured. They can be useful in a mix, but a thick layer can compact. Spread them through dry leaves or shredded cardboard instead of tipping a café-sized mass into one spot.
Worms are a separate decision. Red wigglers suit a cooler vermicomposting system; they are not a reliable repair crew for a thermophilic centre. If the pile is actively hot, put the worms elsewhere. If the pile is cool and you want worm composting, build a dedicated bin with bedding and conditions suited to that process.
Keep monitoring simple: check the centre temperature after a rebuild, inspect moisture by hand, and look at the texture when you turn. A compost thermometer can help you distinguish a cool surface from a cool core only when the probe is inserted deeply enough to sample the active mass; a shallow reading tells you little about the centre.
Use this final decision: if the corrected pile warms and smells earthy, leave it mostly alone while it matures. If it stays cold but is loose and damp, switch to slow composting rather than adding more nitrogen. If it repeatedly turns slimy or sour, change the feed mix or bin design. And if you plan to use unfinished compost in vegetable beds, read What to do with unfinished compost before using it in vegetable beds before spreading it around crops.
Should I add compost activator to a pile that will not heat?
Usually, no—not as the first fix. Check nitrogen-rich material, moisture, airflow, and volume in that order. Activator may add organisms, but it cannot compensate for a saturated or undersized pile.
Why is my compost hot in the middle but cold at the edges?
The centre is holding more mass and moisture, while the edges lose heat to the surrounding air. During the next turn, move outer material into the middle and place the former centre around the outside. If the pattern repeats, enlarge the batch or improve insulation and bin design.
Can I add worms to a hot composting bin?
Not while it is actively heating. Keep red wigglers in a separate, cooler vermicomposting system; they are not a substitute for correcting a hot pile’s mix.
Save the useful distinction: a cold pile needs a diagnosis, not a stimulant. Measure the centre, correct the physical conditions once, and then decide whether you want a hot batch, a slow heap, or a different composting system altogether.
Frequently Asked Questions
Should I add compost activator to a pile that will not heat?
Usually not as the first fix. Explain that mature compost or soil may add microbes, but a cold pile more often lacks usable nitrogen, moisture, adequate volume, or oxygen; correct those conditions before buying an activator.
Can too many coffee grounds make a compost pile heat up?
Coffee grounds are a nitrogen-containing input but should be mixed with dry carbon materials rather than added as a thick layer; explain the risk of compaction and the practical role of shredded cardboard or leaves.
Why is my compost pile hot in the middle but cold at the edges?
The center is retaining more moisture and mass, while the edges lose heat. Recommend mixing the outer material into the center during a turn and insulating or enlarging the bin if this happens repeatedly.
Can I add worms to a hot composting bin?
Not while the pile is actively heating. Explain that red wigglers are better suited to a separate, cooler vermicomposting system and may leave or die in thermophilic conditions.